This is the third in a series of six articles describing the perfect golf grip, starting with Golf Swing 104a – Setup: The Perfect Golf Grip.
Once again, apologies to the lefties, for simplicity these instructions are given for a right-handed golfer.
Your right hand is primarily responsible for transferring the energy that is generated by your body through to the golf club, in order to maximise club head speed through impact.
It plays a role in helping your left hand to control the golf club, and it must work in close harmony with your left hand, not overpowering it and disrupting its precise control. It must encourage the free release of the golf club with your left hand, not restrict it.
Placing Your Right Hand on the Golf Club
To complete your grip by placing your right hand correctly on the golf club, carefully follow the following steps:
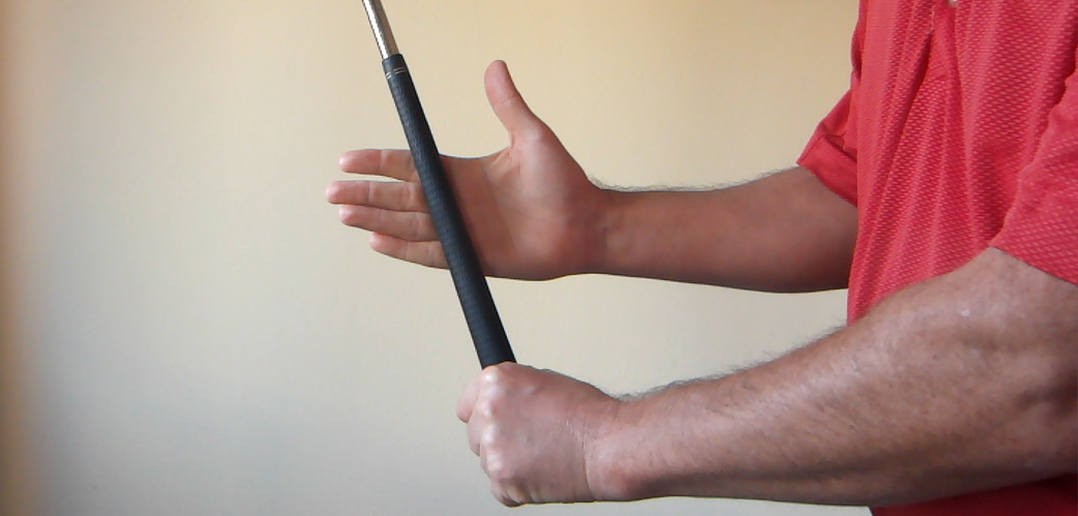
- Start by holding the club up in front of you in your left hand, with your left arm bent at the elbow, gripping the golf club as described in Golf Swing 104b, ensuring that the club face remains exactly vertical.
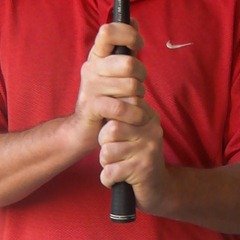
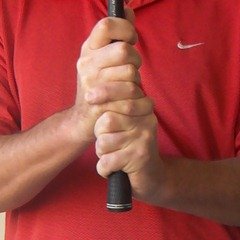
- Place the proximal phalanges of your middle and ring fingers on the bottom-right of the handle, with your ring finger snugly alongside the index finger of your left hand. Your hands should sit snugly alongside each other on the club handle, but don’t squash them together — see Figure 1.
- As you do this, either overlap or interlock your little finger (see below).
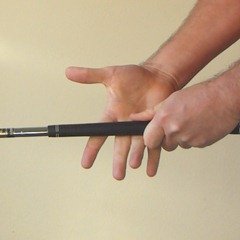
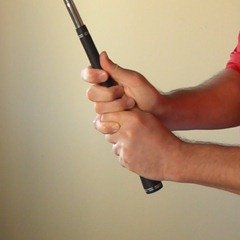
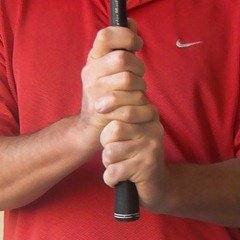
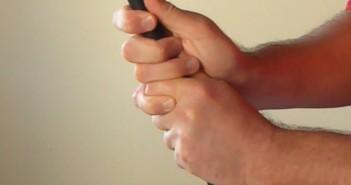
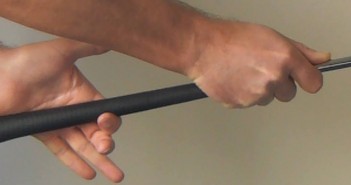
- Fold your right palm over the top of your left thumb, so that the left thumb fits snugly into the pocket formed by the life line of your right palm — see Figure 2. This should feel like a perfect fit. As you look down on your grip, your left thumb should be hidden completely — see Figure 4.
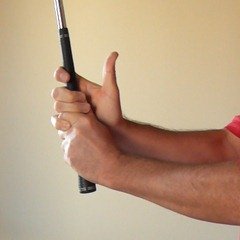
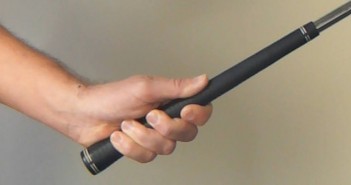
- Now place the handle in the trigger of your index finger. There will be a small gap between your middle and index fingers — see Figures 2 and 3.
- As you close your grip, the tips of your middle and ring fingers should just lightly brush the ball of your thumb (the thenar eminence) — see Figure 3.
- The proximal phalanx of your index finger should be across the right side of the handle. Roll the big knuckle at the base of your index finger up the right side of the handle a little, so that it feels slightly more on top of the club — see Figure 4.
- Place your thumb lightly along the left-top of the handle. It is responsible for providing feel and should be free of tension. Your thumb should be touching, but not firmly pressed against, the base of your index finger. The tip of your index finger will touch (or be very close to) the pad of your thumb — see Figures 3 and 4.
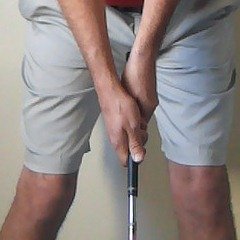
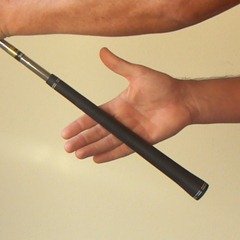
- The club handle will be running across the proximal phalanges of your index, middle and ring fingers — see Figure 5.
- Check once more that the club face is exactly vertical, and that the bony ridge on top of your left wrist is exactly over the centre of the handle.
Your completed grip should feel solid, secure, snug and compact. You should have a sense of the hands being unified, melded together as a single unit.
Waggle the club and be very aware of the proximal phalanges of your middle, ring, and index fingers, as well as the big knuckle at the base of your index finger. Feel how energy is transferred to the golf club through these points, and work to develop your awareness of them, they will be of crucial importance as you build a great golf swing with the Swing like a Champion system.
Why This Works
One of the key features of a good right hand grip is that the hands are joined so that they don’t have any independent action. You achieve this by putting your left thumb snugly in the life line of your right palm.
This position will also ensure that the ulnar (little finger) sides of your hands are parallel (palms facing), and thus working in concert. They will also be parallel to the club face.
Your right hand is activated, for efficient transfer of energy, by holding the club handle towards the base of your fingers, not in your palm and not low in your fingers. The transfer of energy, generated by your body during the swing, through to the golf club takes place primarily through the proximal phalanges of your middle and ring fingers, and also your index finger.
Placing your thumb alongside the base of your index finger enables your right hand to properly support the club at the top of your backswing. It also helps to ensure that your right index finger stays in the correct place on the grip. Whenever we see a student who has a gap between their right thumb and the base of their index finger, we know, before we even see them swing a club, that they don’t use their right hand to transfer energy to the golf club properly.
Your index finger is slightly separated from your middle finger as it forms a trigger, this increases your feel, especially your ability to sense the lag in the golf club generated in the downswing. This sensitivity is crucial for timing your downswing correctly.
Overlap or Interlock?
It should be no surprise that the perfect grip that we describe is, essentially, the Vardon grip (named after the famous British golfer, Harry Vardon). The Vardon grip has stood the test of time, and is used by the vast majority of professional golfers today.
Whether you choose to use the overlapping or the interlocking grip is up to you, they are both equally effective, it’s a matter of what feels best for you.
Most amateurs do, however, make mistakes with both of these techniques.
With the overlapping grip, it is crucial that the proximal phalanges of your middle and ring fingers are placed securely on the club handle. Many golfers reach over with their little finger such that they lift the ring finger off the club slightly. Your little finger is just along for the ride, it doesn’t need to be gripping your left hand in any way, just resting on it, so you don’t need to reach over to the notch between the left index and middle fingers, just resting on top of the index finger is fine — see Figure 6.
With the interlocking grip, many amateurs that we see entwine their right little finger and left index fingers too far. When you do that, it is difficult to get your right hand out from under the club handle in order to fold it properly over the left thumb. You should only interlock the fingers just enough so that the knuckles of those fingers are touching, and not jam them together — see Figures 7 (correct) and 8 (wrong).
If you have any questions or comments about this or other articles on Golf Loopy, please send us an email.
Next up: How to determine the strength of your golf grip, in Golf Swing 104d – Setup: The Perfect Golf Grip – Grip Strength.

