Recording your swing with a video camera during your practice and drill sessions is vital for rapid improvement.
Once you learn to use this tool properly, the video camera, together with the instruction found on this site, will quickly make you a better golfer. It will help you to perform drills effectively, to learn how to develop your feel for the correct movements, to self-diagnose your swing faults, and to continuously improve your golf swing.
As well as analysing your full swing and drill work, recording your swing is also very useful when working on the rest of your game, including your pitching, chipping, sand play and putting stroke.
What you Feel is Not Real
This is one of the most important concepts to understand when you are working on your golf swing. Feel is not real, what you think you are doing, what you feel, is rarely what you are actually doing.
If you think you’re doing it enough, it’s never nearly enough!
The Golf Loopy Swing like a Champion system works primarily by building “feels”, by enabling you to develop your self-awareness, your proprioception, so that you are able to feel the correct movements.
What you feel will change over time. What once felt awkward when it was a new movement for you, will feel natural as your mastery of the golf swing develops. What feels “right” today, if you are a mid- to high-handicapper, will feel very wrong when you are playing off single figures. Some drills will exaggerate certain feelings in order to help you learn a new movement, but these exaggerations may be harmful once the new movement pattern is ingrained. Learning these “feels”, and changing them as you develop as a golfer, while all the time knowing that you are learning correctly, is crucial.
The video camera, together with other tools such as mirrors, provide you with augmented feedback — they provide a vital bridge between what is actually happening and what you feel you are doing.
This feedback is vital to be able to quickly detect your mistakes and verify your successes during practice. The instruction on this site will enable you to analyse the recordings of your swing to make sure that your movements are correct, that you are in the right positions, for an efficient, powerful, safe and repeatable swing.
And by using the video camera to reconcile feel with real, you will develop your proprioception, your ability to interpret intrinsic feedback, which you will need when out on the course.
How to Use the Camera
Once again, our apologies to the lefties out there, but for simplicity we will describe positions for the right handed golfer.
There are two main views of your golf swing that you will record; “down the line” and “face on”. These two angles will, when used together, give you the information you need to analyse your swing.
In the down the line view, the camera is positioned to your right, facing towards the target — see Figure 1.
In the face on view, the camera is directly in front of you, so that your shoulders and hips are perpendicular to the camera — see Figure 2.

Figure 1. Down the line view
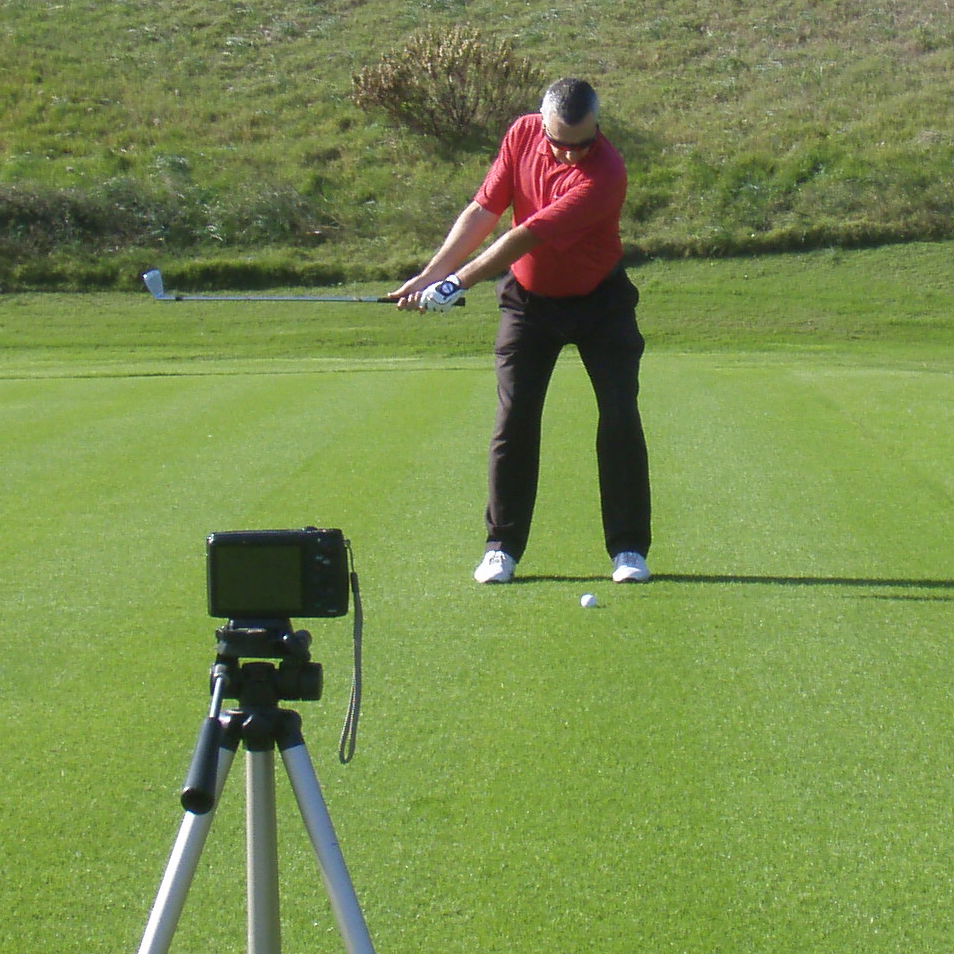
Figure 2. Face on view
In every practice session, you should record both the face on and down the line views using the same club. When these views are used together, they will give you a three-dimensional view of the positions of your body and the golf club at each point in time.
If you have two cameras, or if you practise with a friend who also has a camera, you can record both views simultaneously for the same swing. While this is ideal, it is not necessary — even if you are inconsistent, your swing doesn’t change as much as you might think from one swing to the next in the same session, if you are trying to do the same thing with each.
If you are recording your full swing, you will need to work in bright light for optimum camera performance.
You should always be hitting a golf ball when you record your full swing — you will not swing the same if you are just pretending to hit a ball — foam practice balls are perfect for this if you are working indoors.
Use a tripod
For best results, you should always set your camera up on a tripod. Any movement of the camera during the recording will distort the feedback.
Shutter speed
The club head and shaft move very quickly during the golf swing, and to have any chance of seeing the club position, especially the face angle, as you come into impact, you will need a fast shutter speed. We will discuss this more when we talk about which type of camera is best, but ideally you need a minimum of 1/1000th of a second, preferably 1/2000th, which also means you will need good bright lighting conditions.
You will often record your drill sessions indoors, and if you’re working in dim artificial light then your shutter speed will be slower. For drill work this is normally fine because you are not usually swinging at full speed.
Positioning the camera
For accurate analysis of your swing, as well as for correctly monitoring your progress, it is crucial that you set up the camera correctly and consistently.
If the camera changes position from session to session, the view of your swing, and thus the feedback you get, may differ significantly.
By moving the camera to the right in the down the line view, for example, your stance will appear closed (turned to the right) when it is perfectly square. And the club shaft may appear “across the line” (pointing to the right of the target), when it is in fact slightly “laid off” (pointing left).
Also, your distance from the camera during the recording will alter the perspective, similarly distorting the feedback that the recording provides.
It is, however, easy to set up the camera consistently and correctly with just a little practice.

Figure 3. Recording the face on view

Figure 4. Recording the down the line view
Camera height
The camera lens should be at hip height for both face on and down the line views. Measure the height of your belt buckle when you are set up to the ball and use this height every time.
By making marks on the tripod legs once it is correctly positioned, you will be able to quickly set it up at the same height every time.
Distance from the ball
To avoid distortions caused by the changing perspective of the golf club as it moves through its arc from one side of the frame to the other, it is best to have the camera at least 20 feet (6 metres) from the golf ball for both face on and down the line views — see Figures 3 and 4.
In practice, this isn’t always possible, especially when working indoors or in a confined range bay, but try to be consistent. If you are forced to move the camera closer for a particular practice session, make a note of it so that you are aware of the distortion during analysis. Wherever possible, try to have at least 15 feet (4.5m) between you and the camera.
Framing the shot
You want to see the complete path of your swing, so the club head must remain in the frame throughout. That said, the image must be zoomed in as much as possible, so that you can clearly see the position of the club face and thus identify related problems during analysis.
Down the line
In the down the line view, the camera lens should be at hip height, directly behind where the end of your club grip meets the shaft when you are in your address position. This position is the best compromise for showing the club position throughout the swing.
With the camera in this position, pointing parallel to the target line, you should frame the image so that there is just a little space between the bottom of the frame and your feet.
There should be about 18” (46cm) of space between the right edge of the frame and the ball, which will leave about 3 feet (90cm) between the left side of the frame and your heels.
The centre of your chest should be half way down the frame — see Figure 1.
Always make sure that the camera is pointing exactly parallel to the target line.
Face on
In the face on view, the camera lens should be at hip height, directly in front of your body, in the centre of your stance — not level with the golf ball — with equal space to the left and right sides of your body.
With the camera in this position you should frame the image so that there is just a little space between the bottom of the frame and the ball.
The centre of your chest should be half way down the frame — see Figure 2.
If you have any questions or comments about this or other articles on Golf Loopy, please send us an email.
You May Also Like…
Which is the Best Video Camera for Recording Your Golf Swing?
For more information on how augmented feedback works, see How to Learn a Great Golf Swing.