By working on your follow-through you can quickly make dramatic improvements to your golf swing. You’ll strike the ball better, with more power and consistency, and you’ll swing safely and free from pain.
A great golf swing follow-through is simply a consequence of a great golf swing, the continuation of a great release. The way that you move in the follow-through is a reaction to the moves that you made throughout the swing, particularly during the transition and downswing.
The finish is the sum of all the parts.
So, as long as you know how to do it safely, the follow-through isn’t really something that you wish to control directly, for the most part you just let it happen, and the best way to fix your follow-through is usually to work on earlier parts of your swing.
But the follow-through can be a very valuable diagnostic tool and training aid to help improve your whole swing:
- When you understand what the follow-through should look like, it will give you a deeper understanding of what you are trying to achieve in other parts of the golf swing.
- By looking closely at your follow-through, you can quickly identify many of the faults that may exist in other parts of your swing.
- Sometimes, by working on your follow-through, it can be useful to work backwards from the destination of your golf swing, and doing so can quickly improve your game. Thinking about how you want to finish will change what you do earlier in the swing, and because the follow-through happens much more slowly than the downswing, you can more easily feel it when you make changes.
- Finally, by ensuring that you finish the swing properly, you ensure that you are swinging within yourself. The follow-through can be used as a regulator to ensure that you don’t hit poor shots by trying to swing faster than your current abilities allow.
Apologies once again to all our lefty friends, but for simplicity we’ll describe the movements for the right-handed golfer.
Analysing Your Follow-Through
Using feel, mirrors and video, you should regularly examine the following aspects of your follow-through:
The Pivot
Your hips should rotate around your left hip joint through to a balanced finish.
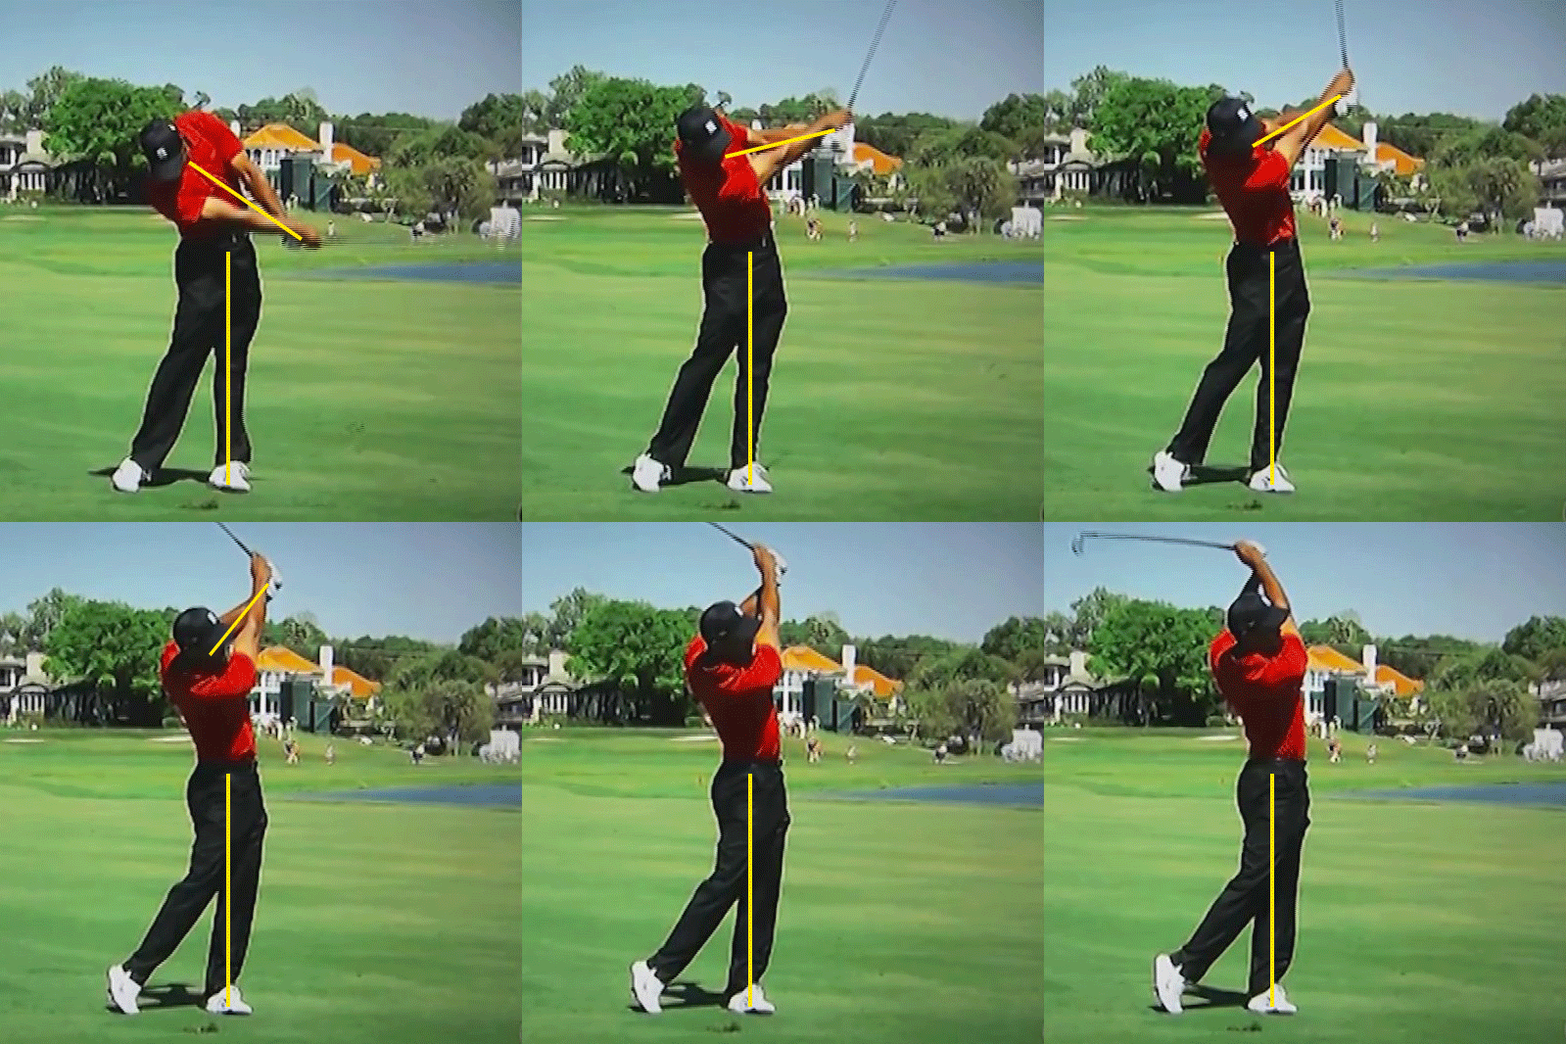
Figure 1. Tiger Woods’ follow-through, face on.
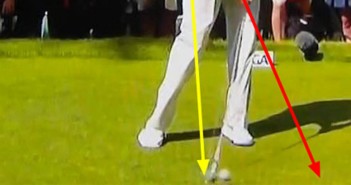
All the way from the moment of impact through to your finish, your left leg should be in a “stacked” position, with your left hip joint, knee and ankle forming a straight vertical line – see Figure 1.
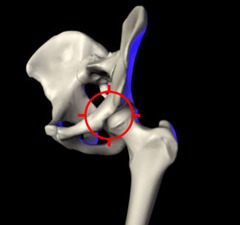
Note that the hip joint is well inside your body, see Figure 2, so the outside of your hip must be outside (closer to the target than) your ankle in order for the joints to align.
You should have 90% of your weight over your left ankle and heel as you rotate around your hip joint, pulling your left buttock away from the target and extending your hips, thrusting your belt buckle towards the target – see Figure 1.
At the finish, your right foot should have been pulled up onto the tip of your toes by your rotating hips. The sole of your shoe should be vertical, facing away from the target. If there is any bend in the toe of your shoe at the finish, this is a sure sign that you have too much weight on your right foot, that you haven’t shifted your weight properly. The only reason that your right foot is still even touching the ground at the finish is to aid with balance.
Note that your right foot does not “spin out” – your heel doesn’t move significantly away from the target at any point during the golf swing – see Figure 1. During the downswing, it is pulled onto the inside of your shoe as you shift left, then it is pulled up onto your toes as your hips rotate through to the finish.
At the finish, your belt buckle should be facing the target – see Figure 1.
An incorrect pivot is the most common cause of discomfort and injury in your back, hip and knee in the golf swing.
If your weight is forwards, more over the ball of your foot, this will place some of the responsibility for rotation on your left knee. Unlike your hip, your knee is not meant to move in this way, and you will damage your knee joint over time.
If the centre of your hip joint is thrust out, closer to the target than your ankle (usually by pushing off the right side in your downswing and “sliding” left), this will put your hip joint in a position where it cannot rotate freely. You will damage your hip joint and put a great deal of strain on your back.
If the centre of your hip joint is inside your ankle, further from the target, then you haven’t shifted left effectively and you’ll lose power and consistency. This is usually caused by a poor transition, or by firing your shoulders and arms from the top, which will cause the momentum of the club to pull you to the right and prevent a proper shift.
Maintain Posture
You should maintain your posture (your “spine angle”) until well after impact. Doing so will help to improve your ball striking and consistency – see Golf Swing Drill 505 – Downswing: Maintaining Posture.
Keep your head behind the address ball position as your arms release through impact and through to the finish – see Figure 1.
Keep your head in line with your spine. Your head should not begin to lift until your hands reach at least chest height – see Figures 2, 3 and 7.
Don’t “lift” your eyes, which will cause you to stand up and lose posture, but do allow your head to swivel around your axis of rotation in order to follow the ball with your eyes– see Figures 3 and 7. This will help to ensure an unrestricted finish, and thus a better release and more speed through impact.
The other main cause of losing posture, of “early extension” or “standing up”, is thrusting your right hip forwards in the downswing. You must maintain your “tush line” through to the finish by pulling back and around, away from the target, with your left buttock, and not pushing off your right leg, as described in the transition and downswing sections.
This, together with a proper pivot, will give you the much-desired feeling of “covering the shot” with your chest through impact.
You should feel like you are rotating your body through the ball and into the finish.
…But Extend Your Hips Through to the Finish
Although you must maintain posture in the downswing, keeping your hips in flexion all the way down into impact, from impact onwards you must extend through your hips, standing taller through your midsection all the way through to the finish.
If your hips stay in flexion beyond impact, you can’t turn through into your finish safely, you will be forced to turn more with your spine, which is why 80% of weekend golfers suffer from issues with the lower right side of their backs.
As you move past the impact position, where your hips are in flexion with your pelvis in anterior tilt (the front of your pelvis is below the rear), you should extend your hips, contracting your left glutes as you stand taller to move your pelvis into a neutral position at the finish, lifting the front of your pelvis and thrusting your belt buckle towards the target.
Hands Extended in Front of Your Chest
Your arms, hands, club and back should extend out past impact, extend through the ball – see Figures 1, 2 and 3.
Your hands should remain directly in front of your chest (in front of your sternum) until very late in the follow-through – see Figures 1 and 3.
This will ensure that the timing and sequence of your swing is correct, it is “in synch”, for power and consistency.
Only at the very end of the follow-through should your elbows begin to fold, and finally your wrists will hinge as you come to a stop – see Figure 4.
The Follow-Through Mirrors the Backswing
The follow-through is very similar to the backswing, almost a mirror image in many ways. The main difference is that you have much more extension into the follow-through as you pivot around your “stacked” left hip.
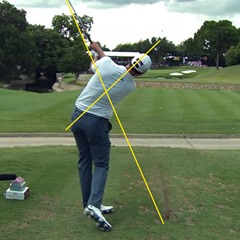
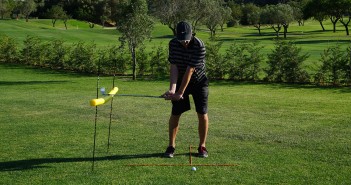
In both the backswing and the follow-through, you should move through a position where your arms are extended out straight in front of you, your hands directly in front of your sternum, and the club shaft is parallel to the ground and almost parallel to the target line (the club head just outside your hands on each side of the swing) – see Figure 2.
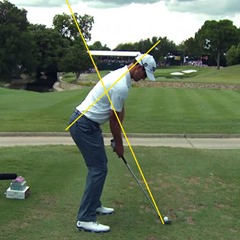
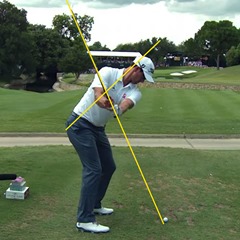
The “swing plane” should be the same in the follow-through as it was in the backswing – see Figures 6 and 7.
Finish in Balance
If you’ve made a great golf swing, then you should be able to comfortably hold your finish with very little weight on your right foot – see Figure 4.
Make a habit of posing at the finish, and holding your balanced pose until after the ball lands, trying to look like a great golfer – pretend you‘re Adam Scott, for example.
Do this even when you hit a bad shot, and you’ll find that you hit a lot more good shots!
Working on Your Follow-Through
A great way to work on all of this, in addition to the transition and downswing drills (especially drills 504h and 505), is to place a second ball 2” (5cm) outside your golf ball and to make half-swings using Golf Swing Drill 501 – Downswing: Great Ball Striking.
Even with these small, easy swings, you should feel yourself doing the following:
- Maintain your posture (“spine angle”) through to the end of the release.
- Allow your head to turn but keep your focus on the second ball until the club is pointing out to the target.
- “Post up” onto your left leg through to the finish as you rotate around your hip joint. At the finish, your leg should be straight but don’t lock your knee.
- Extend your hips, back, arms, hands and club through impact and out towards the target.
- Finish with almost all of your weight over your left ankle and heel, only the tip of the toe of your right foot touching the ground.
- Finish in balance.
Swing very easily at first, checking your finish position carefully in the mirror, and then pick up speed as you gain confidence.
When you’re working on your follow-through in order to correct swing faults, don’t forget to check the corresponding movements earlier in the swing by working in conjunction with the relevant drills.
For example, you may wish to swing more from the inside, so you might work on making sure that the club stays outside your hands for longer in the follow-through. But, if you’re not careful, you’ll soon start taking the club back too far inside in the takeaway in an effort to encourage an “in to out” swing path, and you’ll quickly introduce a whole host of new problems into your golf swing!
If you have any questions or comments about this or other articles on Golf Loopy, please send us an email.

